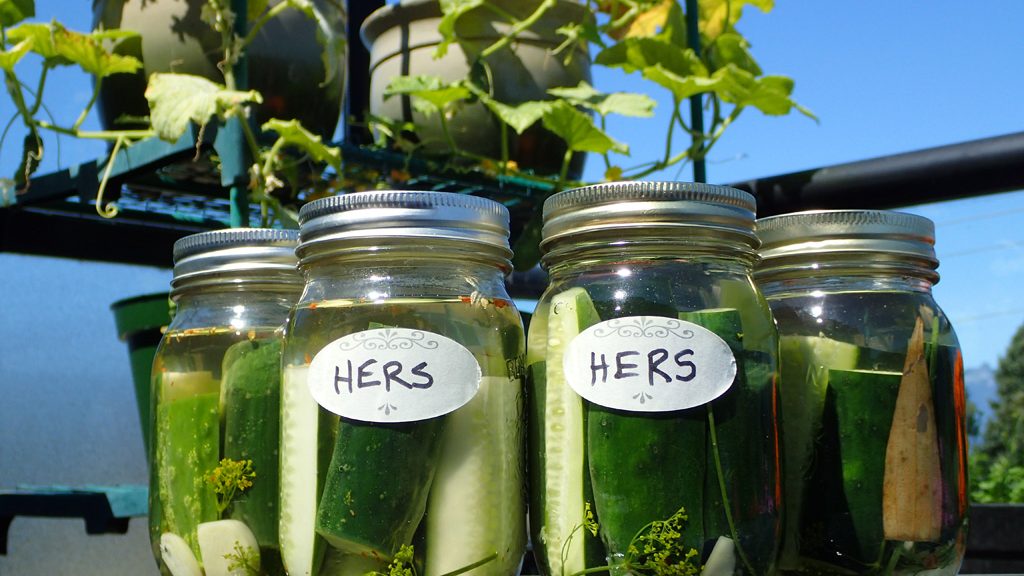
Homemade Dill pickles done two ways

Leanne favours the vinegar version but I’m more into the whole lacto fermentation process because I like the idea of having probiotic munchies on hand. I also like the mad (amateur) science that comes with lacto fermentation — things bubbling in jars is really quite interesting.
From a health perspective the lacto fermented pickles are definitely better for you (see this writeup on the benefits of probiotics here) but I’ve been hit and miss with getting a proper crunch in my final product (the lacto fermented pickles in the picture above went mushy after 4 days and had to be chucked.) Using the vinegar process to preserve the pickles may kill off some healthy vitamins and enzymes but it results in a more consistent and crunchy final product.
Speaking of final products, here is a shot of a lacto fermented pickle (about 10 days old) and a vinegar pickle (about 2 weeks old). Note the colour differences–the vinegar pickle looks like it’s been frozen in time (!) while the lacto fermented one has turned an olive green. They both had a similar crunch, but the lacto fermentation process had softened the skin of that pickle somewhat. The vinegar pickle’s skin was very crispy in comparison. Almost too crispy.
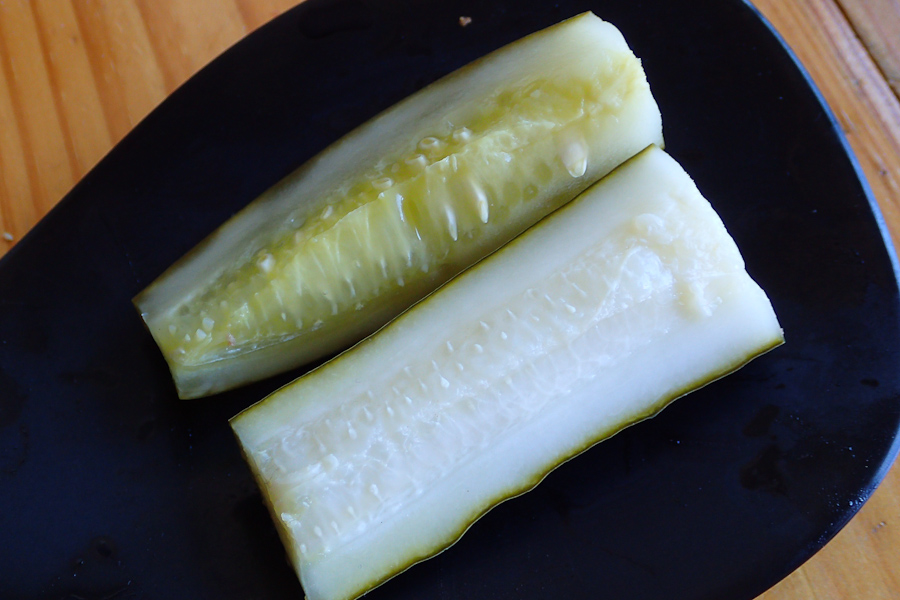
In a blind taste test Leanne wasn’t 100% sure which one was which, but still preferred the vinegar one. I liked the flavour of both, but I wished I had been able to ferment the lacto version longer because the sour taste of a long ferment is way tastier than the sour of the vinegar version. However I was afraid of another spiral into pickle mush so I put the fermented version in the fridge after 7 days. I have had successful pickle ferments in the past and I know that the longer they sit the better they get.
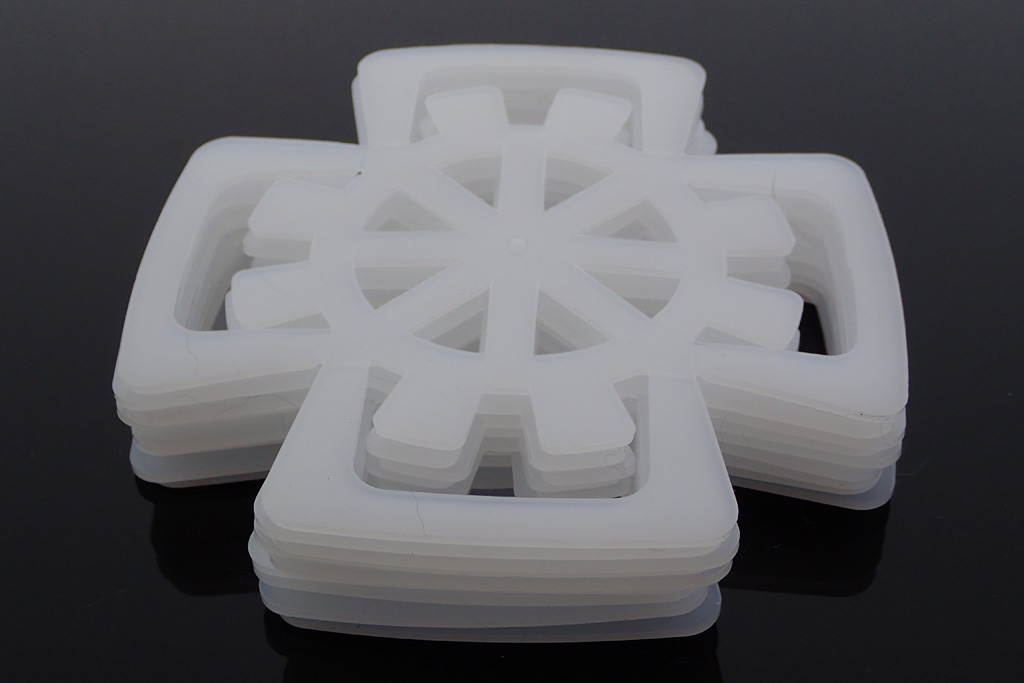
One final note: it is crucial that cucumbers (or any fermenting veggie) remain under the brine for duration of the fermentation. You can buy pricey designer weights or you can fill a baggie with brine and stuff it in the jar, it’s up to you. I discovered these cool plastic things (can’t remember their name) at Gourmet Warehouse which work perfectly. They work out to be about $1 per piece, which is way cheaper than having to trash a batch of pickles due to spoilage.

Here is a basic recipe for each style, feel free to improvise on seasonings to suit your taste.
Basic Lacto Fermented Pickle Recipe
The thing to remember with the lacto fermented version is salt ratio. I use Kosher salt and I find 1 Tbs per cup of water to be a good brine ratio. Also, the problem with mushiness is apparently remedied by the addition of tannin (ie: grape leaves, oak leaves, some people recommend adding black tea). I used bay leaves because I don’t have access to oak or grape leaves where I live.
Ingredients
- 2 cups cold fresh water
- 2 tablespoons salt
- 2 cloves garlic peeled and mashed
- 2 bay leaves, or more to taste
- 1 teaspoon whole coriander seeds
- 1 teaspoon whole black peppercorns
- 1 bunch fresh dill weed
- 4 or 5 fresh pickling cucumbers, washed thoroughly
2 x 500ml mason jars, washed and sanitized
Preparation
- Soak the cucumbers in cold water in the fridge for an hour to ensure crispness
- Mix the water and salt together until the salt has dissolved. You may want to heat the water slightly to help it dissolve (but let it cool before adding it to the cucumbers)
- Divide the dill, garlic and spices between the 2 jars
- Gently pack the sliced cucumbers into the jar until the jar is full. The more firmly you pack them in, the the less likely the pickles will float to the top
- Pour in the pickling brine to a ¼ inch from the top of the jar
- Secure the pickles under the brine with your handy dandy plastic thing
- Loosely secure the lid to allow gasses to escape
- Let pickles ferment for a week, checking every day to ensure pickles remain submerged. Small bubbles may appear, the brine may become cloudy and a foam may appear on the surface–all of this is normal in the fermentation process
Vinegar based pickle recipe
This is a fridge version recipe, which means it is not hot water canned. As the title suggests it goes straight into the fridge after packaging and is left to season for a couple of weeks. Depending on the size of your fridge, this is the easiest and fastest way to pickle with vinegar. If you are doing a bulk batch (or have no room in your fridge) you will probably want to take the recipe below and hot water can it. That way you can store it long term in your pantry, garage or other handy space.
Ingredients
- 1 cup vinegar
- 1 cup filtered water
- 1 tablespoon kosher or any non-iodized salt
- 1.5 tablespoons sugar
- 2 cloves of garlic, mashed
- seasonings of your choice (dill, mustard seed and peppercorns are a good base
mix) - 4 or 5 fresh pickling cucumbers, washed thoroughly
2 x 500ml mason jars, washed and sanitized
Preparation
- Soak the cucumbers whole in cold water in the fridge for an hour to ensure crispness
- Mix the water, vinegar sugar and salt in a saucepan and bring to a gentle boil
- Divide the dill, garlic and spices between the 2 jars
- Cut the ends off the cucumbers and quarter them
- Gently pack the sliced cucumbers into the jar until the jar is full
- Pour the just boiled brine over the cucumbers in the jar
- Secure the pickles under the brine with your handy dandy plastic thing
- Clean the rim with a clean towel and put on the lid
- Try not to sample the pickles for at least a week. Can be stored in the fridge for up to 6 months
Have you tried making both kinds of pickles? Which style do you prefer?